A Toolbox for Imagination
TL;DR - Check out the digital files available here!Nora’s Toolbox - Introduction
My 3-and-a-half year old has informed us of many careers that she’ll be pursuing that include, but are not limited to, astronaut, rock star, doctor, archaeologist, and artist. Depending on how I’m feeling that day, the one that makes me most proud and/or terrified for her, is an engineer. While I love the idea that I’m somehow inspiring her, I also occasionally feel like she’s too smart to follow in my footsteps, and she can do better.
In actuality, I don’t think I’m really inspiring her all that much. Her engineering dreams are attributed to more accomplished minds such as Rosie Revere, Sparks from Super Kitties, Gadget from Rescue Rangers (be still my 8-year-old heart), and Maurice from Beauty and the Beast.
The brightest minds influencing my daughter’s career choice (not my images, spare me mouse dictator).
In her most recent bedtime story demands, she likes to be called upon by the aforementioned heroes to help them fix things that are broken. In these stories, she always counts on her trusty toolbox to find the right things she needs to save the day.
Naturally, this is enough reason for me to go ahead and build her a “toolbox” of her own. However, since her interests are fleeting these days, it’ll be more of an all-purpose container for treasures of her choosing.
This is a fairly simple build that I’m taking on using only a hobby grade laser cutter and some glue and sandpaper. If you’re armed with a 3D printer, you can build the drawers that way, but this would work great with wooden drawers as well. In my case, I wanted the opportunity to get more color on the box so I opted for printing out drawers. I also like this because she can pull them out and play with them and break them if she wants, and I’ll just print a new one when that inevitably happens.
The final product
01. Gather Your Tools & Materials
Wood:
Walnut Hardwood Planks 1/8” x 6-1/2” x 12” (15 pieces required)
Baltic Birch Plywood 1/8” x 12” x 12” (13 pieces required)
Tools & Supplies:
Circular Saw (any saw that can cut plywood will do)
12” x 20” Laser Cutter (Check out Brandon’s channel, Make or Break Shop, for Laser reviews if you’re in the market.)
Optional Drawer Pulls (for wooden drawers)
Total Boat Halcyon Water-Based Varnish (or finish of your choice)
Optional: Epoxy Inlay:
Total Boat High Performance Epoxy
For 3D Printing:
02. Make Panels
Butt joints in 1/8” thick edges? Butt joints in plywood edge grain? Hear me out. We’re going to be skinning the exterior plywood in a second layer so the butt joints don’t line up. The glue line between the layers will be more than sufficient for this small case. On the interior parts that aren’t skinned, the drawers will put most of their weight on the corners of the opening where the material is supported and the middle will just deflect a bit. No big deal.
But what about wood movement? It’s just not enough of an issue at this thickness and size to cause any problems. I’ve built a few pieces this way, and I’ve never had issues.
Cut 4 plywood pieces down to 8” wide by 12” long.
Lay out your cut pieces with whole uncut pieces to glue up 4, 12” x 20” panels.
If your edges don’t line up well, this won’t work, but don’t fret. There’s a dead simple way to fix this. This process is called “jointing”, and it’s a great skill to master if you want to have strong glue joints.
On the left, this gap needs to be remedied. On the right, these boards are ready for glue.
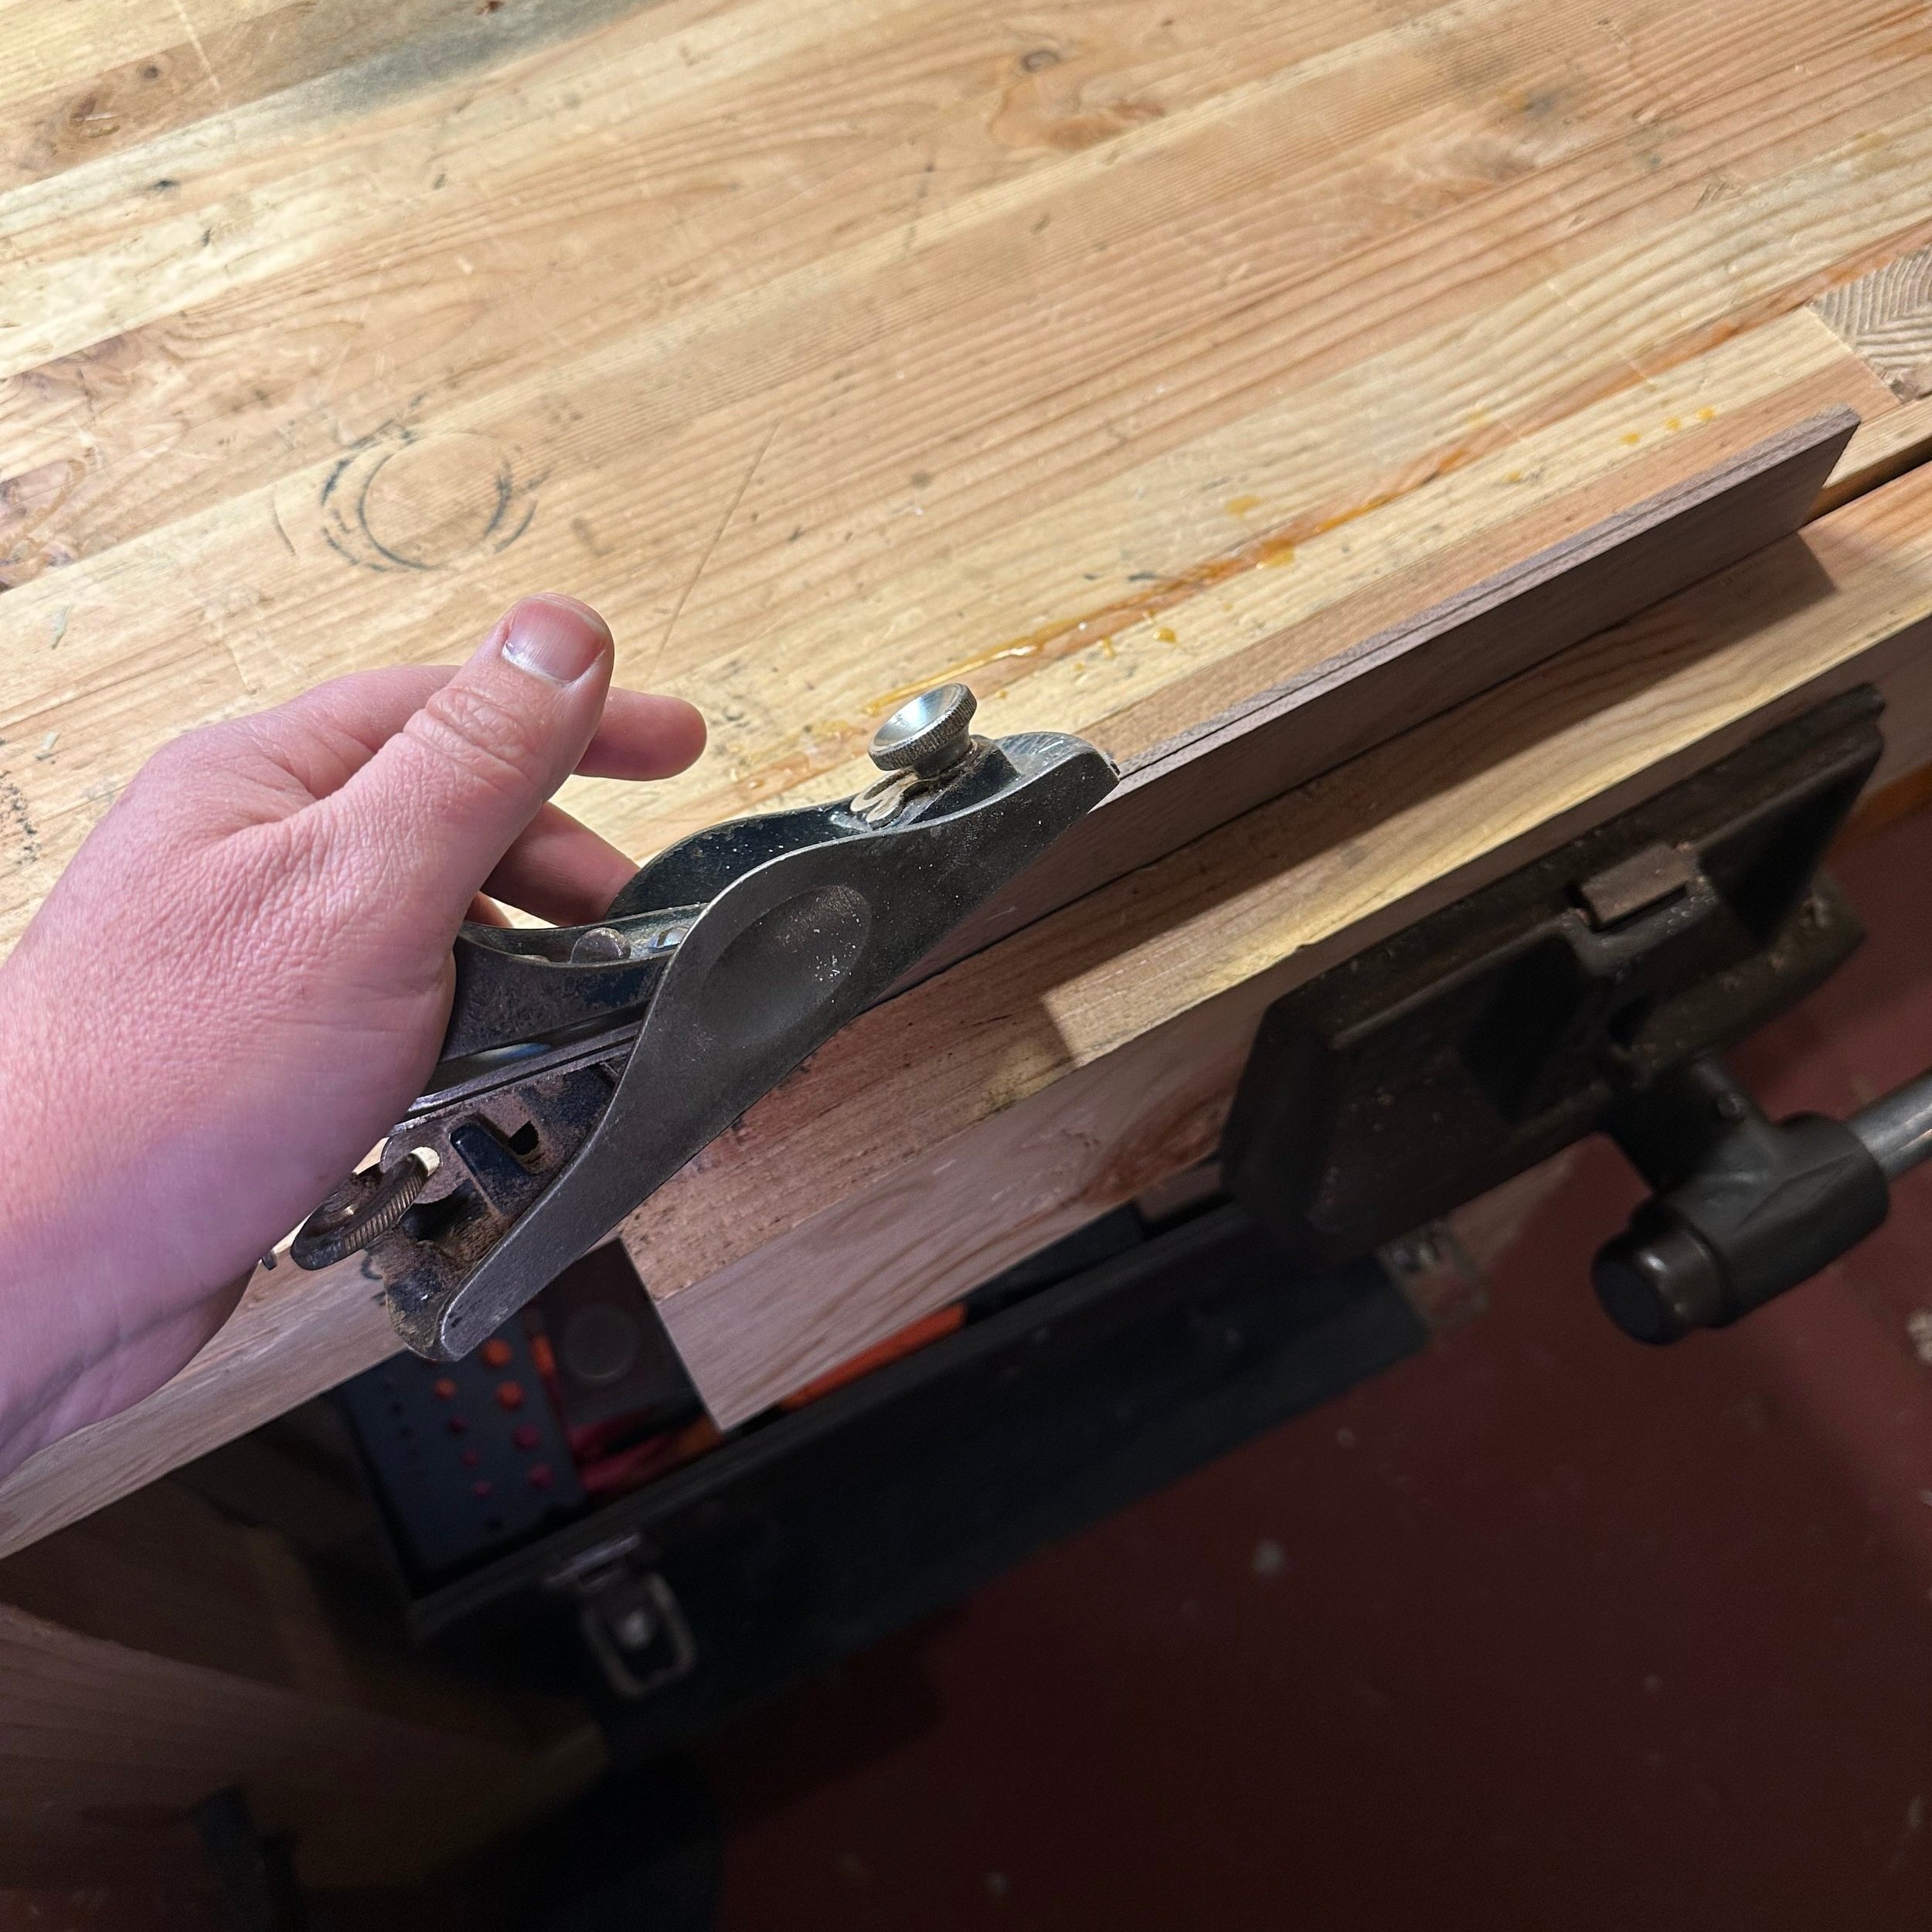
Take your two pieces and fold them at the glue line like a book so the to face up sides are touching each other. With a hand plane, take a few swipes across the edges you’ll be gluing until you get a continuous cut all the way along. It doesn’t matter if your plane iron isn’t perfectly 90º as the complimentary angles will cancel each other out.
Boards are clamped face to face in the vise, and the edges are planed until one continuous shaving from each board comes out. Then its ready for glue.
Hot tip: If you don’t have a hand plane, you can simply cut straight across the two edges with a circular saw and a straight edge to keep it in a line. You could also use the table saw and a miter gauge, or even a sliding miter saw if you have one that’ll cut 12”. Again, the blade being slightly off 90º will not have any effect on the joint.
Run a small bead of glue along the edge and secure the joint with blue tape (or green or yellow, mine is blue). I like to make a tape hinge on one side before gluing, then I lay it on a flat surface and stretch tape across the opposite side to hold it nice and snug.
I wipe off the excess glue with a damp rag to avoid having to scrape it off once it’s dry. It leaves a bit of a stain, but that’ll either be covered up or will come out in the sanding later.
Repeat the process with the 1/8” thick solid walnut, making 5 panels that are each 3 pieces wide, for a final dim of 12” x 19-1/2”.
Glued up and drying.
03. Pew Pew
Load your panels and cut the pieces out on your laser cutter. Be sure to dial in your settings on a piece of scrap before attempting the cuts on your panels. Each file name will tell you what you need to know in the following format
<description>.<material>.<quantity required>.DXF
If, like me, you get some incomplete cuts, take a razor blade or a hobby knife and finish off the cuts as required. This can happen when there are knots in the wood on the inside layer of the plywood or thicker pockets of glue.
On the face panel, I had a few locations where the skinny edges broke. No big deal, just save anything that came off and glue it all back on during assembly. The break lines will disappear.
Pile o’ laser parts ready for assembly!
03a. Optional Epoxy Inlay
If you have the means, you can add artwork or text to the top panel to engrave in the laser and backfill with epoxy. I’m also adding a line item to the store for a custom file if you need a hand generating the art.
For the epoxy fill, simply follow the instructions on mixing the resin and fill the engraving with the syringe. I mixed up a larger batch then split it into smaller cups to get different colors. Here are a few tips I picked up along the way. Most of them are centered around avoiding have to sand epoxy. It’s not as easy to clean up as YouTube would have you think.
Get the piece level before starting the pour.
Use Tuck Tape to fill any holes and seal up any porosity you might have where the engraving was done.
Use the hot glue gun to make a dam around each different color section. That way if you overfill it won’t get everywhere.
Go slowly and carefully and try to fill each engraved well just enough. I did a test piece before where I overfilled it too much, and I got bored and gave up before I sanded it flush.
Wear your PPE. Getting epoxy on your skin or eyes is very unpleasant.
If you’re going to be cool and pop the bubbles with a heat gun or torch, put it on low and start far away. You don’t want to make a mess blowing it all over with hot air.
Getting ready for the epoxy pour.
Freshly poured epoxy! Now we wait.
04. Assembly
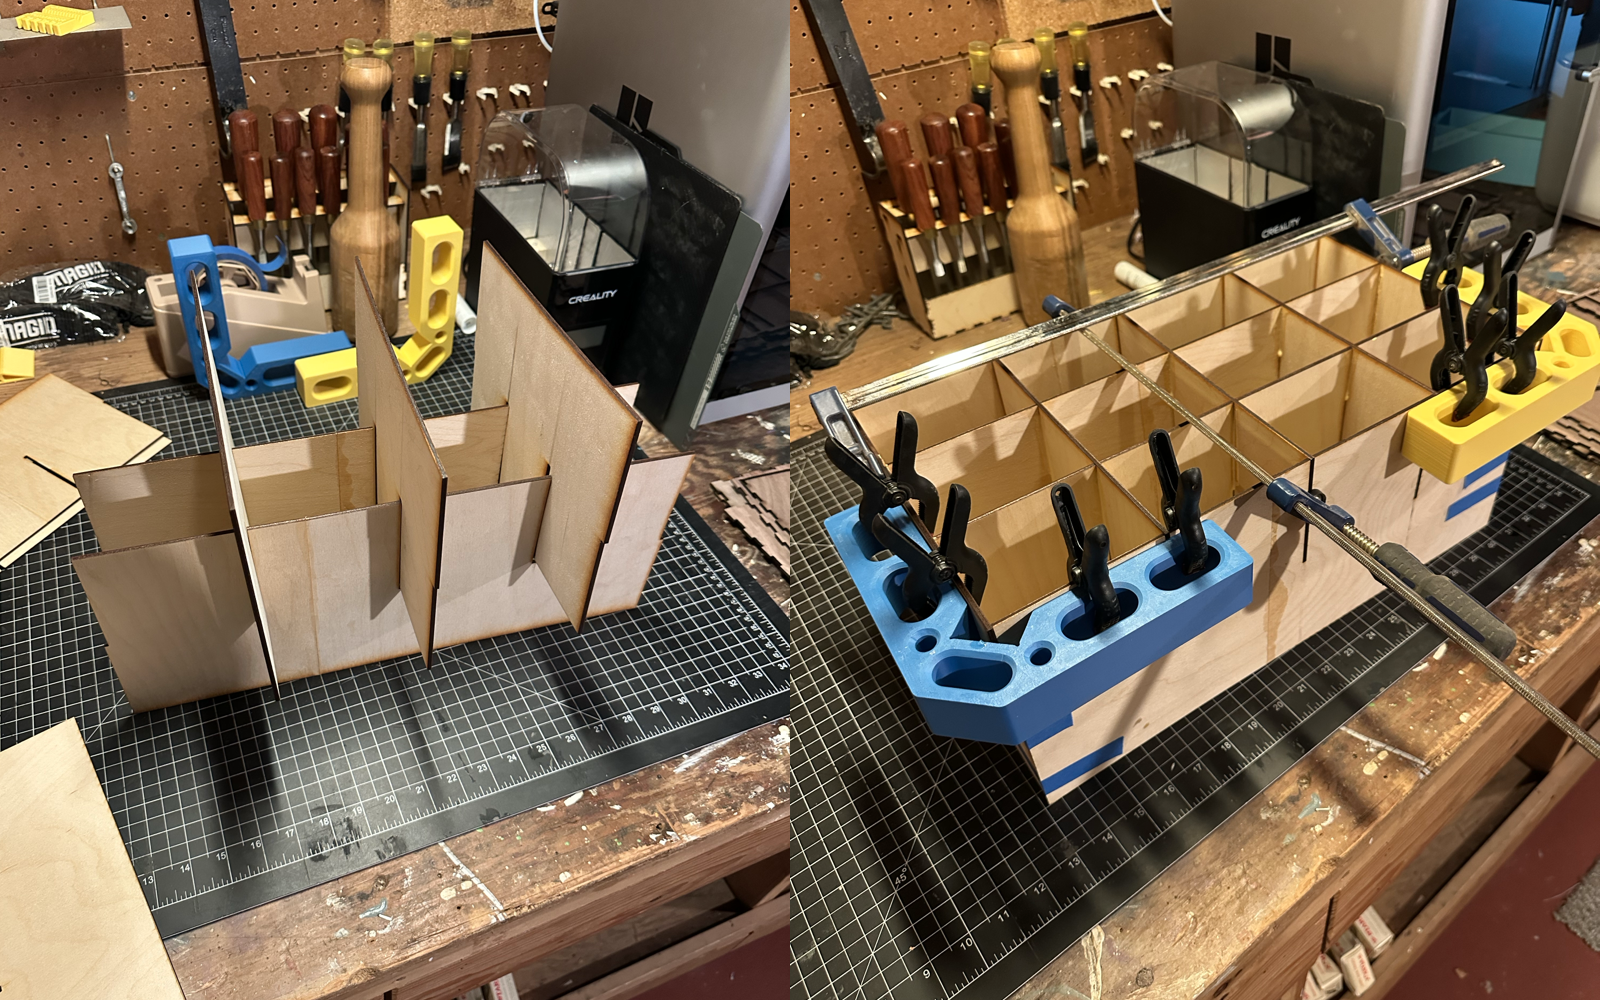
I started with the interior plywood pieces. It’s a good idea to have a few decent clamping squares handy and just use small beads of glue in the joints so you don’t have a lot of squeeze out interfering at the next step. This egg crate assembly will be pretty flimsy until we get the outer case on to support it. Add dabs of super glue and activator spray as needed to help hold pieces in place.
Start with the inner pieces. Get glue in everywhere you can.
Hot Tip: If you don’t have any clamping squares, there are about a million of them on Thingiverse and Makerworld that you can 3D print.
Once you have the inner structure built, move on to assembling the outer pieces made of solid walnut. Add a thin coating of glue to the big flat surfaces and a bead in the finger joints to tie them all together. It’s best to do a dry assembly first to lock in your clamping strategy. I use a combination of clamps, light taps with a rubber mallet, and blue tape to get the job done.
Case glued up, less the front.
If you’re opting for the wooden drawers, build them similarly to the case. You will likely have to tune the fit by sanding the sides until your drawers slide in and out cleanly. A bit of wax on the drawers also helps. Note that I choose to make my drawers a bit on the small side so any errant glue between the back panel and the interior pieces doesn’t make it impossible to close them all the way. If your drawers tend to close too far, you can add a little furniture sticky foot to the back to stop it farther out.
05. Finishing
Sand up through the grits before applying your favorite finish. If you have little blobs of glue or ugly burns around the drawer openings, try adhering some sand paper to a popsicle stick to get in there.
My corner sanding tool.
I opted for building up a few coats of water based varnish. This Total Boat Halcyon gloss was easy to apply with a foam brush, and it is ready for an additional coat in 1 hour. I was able to get 4 coats on all visible sides and one on the bottom in a single day.
Done!
Enjoy!
I’ve made 3 pieces using this method so far, and it’s a fun way to build something small that looks great. You can pretty easily tweak the concept for a mini apothecary cabinet or a desktop organizer for charging cables and writing utensils (nerd alert!).
Hopefully my little client will fill these drawers with the tools she needs for her career du jour for years to come.
Thanks for following along. If you give this a try, please share it with me on Instagram- I’d love to see it. If you’d like to purchase the digital files, you may do so here.
Helpful Resources:
www.makercase.com - simple tool to generate digital files for boxes. I use these for drawers rather than modeling them all in Fusion 360.
Fusion 360 for Makers - I Like to Make Stuff course on Fusion 360. If you want to design your own project in Fusion or modify this one, Bob’s course is a great resource.
Make or Break Shop - Awesome channel for laser cutting references.


